

PhotoDirectorで画像の色を変更する方法を教えてください。
このような声にお応えして参考となる記事をご用意しました。
こちらの記事ではCyberLink(サイバーリンク)の画像編集ソフト「PhotoDirector」で画像の色を変更する方法について解説します。
記事の内容を見ていただくだけで素敵な画像が完成しますよ。
私は動画編集歴15年以上。
画像作成のためにPhotoDirectorを愛用しています。
CyberLinkのPhotoDirectorは初心者に優しいソフトなので色を変更する方法も簡単です。
しかし、分かりにくい部分もあるのでぜひ参考にしてくださいね。
PhotoDirectorのバージョンによっては操作画面やボタンの位置が異なる場合もありますので、あらかじめご了承ください。
この記事で分かること
- CyberLinkPhotoDirectorで画像の色を変更する方法
- CyberLinkPhotoDirectorのモザイク機能の使い方
- スマホ版(iphone・Android)PhotoDirectorで色を変更する方法など
⇩YouTubeサムネイルの作り方を例にPhotoDirectorの使い方を解説しています。

1,000人中983人の方に「公式サイトより分かりやすい」と高評価をいただいています。
ぜひご活用ください。
PhotoDirectorで色を変更する方法【ガイド編集】

以下で順番にそれぞれ詳しく解説します。
①PhotoDirectorで色調を変更する方法
PhotoDirectorで明るさや色合いなど、色調を補正したい場合は「色調整」機能を使います。
⇧「色調整」→「自動カラーエンハンスメント」→「適用」を選択すると自動的に色調が補正されます。
手動で変更したい場合。
- 「色調整」→「調整」を選択
- 露光量や明るさなどを細かく設定できる
②PhotoDirectorで部分調整する方法
PhotoDirectorで一部分だけ色合いや明るさを調整したい場合は「カラー置き換え」を使います。
⇧「フォトエフェクト」→「カラー」→「カラー置換」の順に選択。
⇧調整したい部分をスポイトで選択→色相などを調整する。
③PhotoDirectorで部分的に色を変更する方法
PhotoDirectorで部分的に色を変更する方法を解説します。
ガイド編集では細かい変更ができないので「エキスパート編集」を使います。
⇧「エキスパート編集」タブを選択して切り替える。
エキスパート編集だと細かい設定が可能になります。
色を変更したい領域を選択。
- 「領域選択ツール」→「マジックワンド」の順に選択
- 色を変えたい部分をクリックすると同じ色域が選択される
- ムラを調整
⇧右下の「色の設定」から好きな色に変更。
範囲を選択してから色を変更するという手順です。
範囲を選択する方法は他にもあるので色々試してみましょう。
④PhotoDirectorで背景の色を変える方法
ここではAIを使って背景(空)の色を変更する方法を解説します。
画像を読み込んだら「空の置き換え」を選びます。
⇧「フォトエフェクト」から「空の置き換え」を選ぶ。
空のテンプレートから好きなのを選ぶ。
⇧あらかじめ用意されている空を選ぶことで置き換えできます。
曇りを晴れに変えたりできるので便利です。
⑤PhotoDirectorで色を反転させる方法
PhotoDirectorで色を反転させる方法を解説します。
「ガイド編集」ではできないので「エキスパート編集」に変更します。
⇧「画像の色を反転」で正反対の色になります。
領域を指定すれば一部分の色だけ変えることもできます。
⑥PhotoDirectorで塗りつぶしする方法
「エキスパート編集」の「塗りつぶしツール」を使うことで塗りつぶしができます。
⇧「塗りつぶしツール」を選択してクリックするだけ。
事前に領域を指定すれば一部分の色だけ塗りつぶしができます。
⑦スマホ版PhotoDirectorで色を変更する方法
スマホアプリ版PhotoDirector(iphone・Android)でも画像の色を変更することができます。
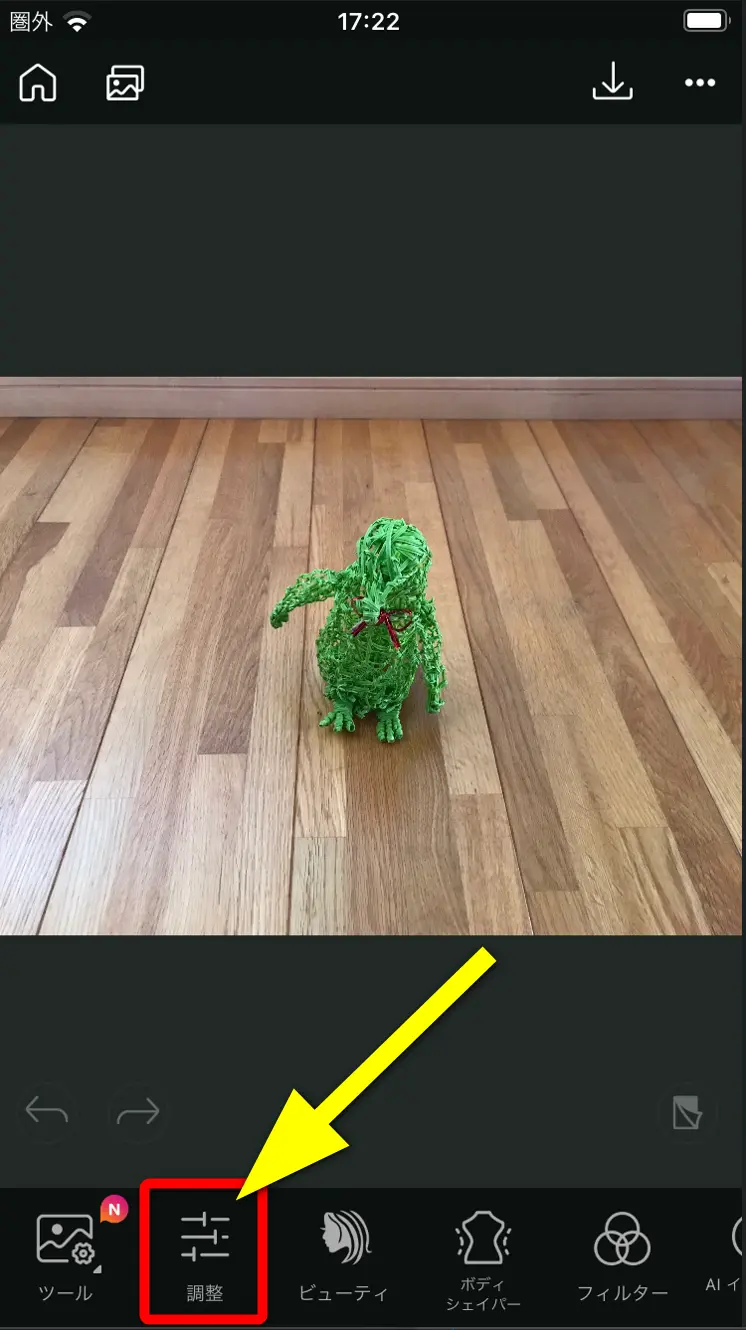
⇧画像を読み込んだら「調整」を選択。
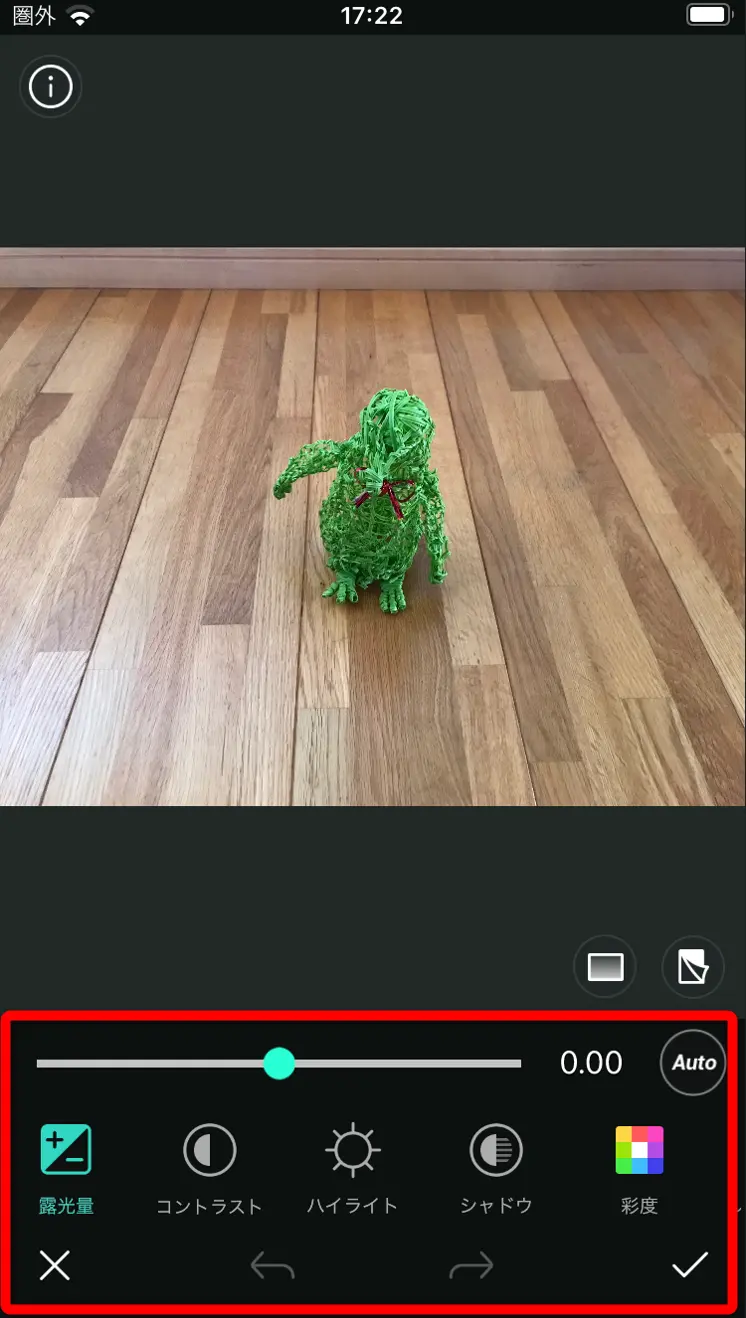
⇧明るさなどの変更ができる。
他にもAIによる空の置き換えなども使えるので色々試してみましょう。
PhotoDirectorは色の変更が簡単な画像編集ソフト
⇧出典:CyberLink
| 会社名 | CyberLink |
| 本社 | 台湾(新北市) |
| 創業 | 1996年 |
| 創設者 | Jau Huang |
| 日本支社 | 東京都港区芝大門1-16-3 |
| システム要件(Windows) | Microsoft Windows 11、10、8.1、7(64ビットOSのみ) |
| システム要件(Mac) | macOS 10.14 以降 |
| サポート 対応 | 電話 メール |
| 公式サイト | 公式で確認 |
買い切り版はWindowsのみ対応です。
Macで使うならサブスク版の購入が必須です。
ほとんどの画像形式に対応しています。
PhotoDirectorを提供しているCyberLinkは台湾のメーカーです。
CyberLinkは1996年に設立され、主にマルチメディア関連ソフトウエアの開発を手がけてきました。
PhotoDirectorの他にも
- PowerDirector(動画編集ソフト)
- PowerDVD(動画再生ソフト)
- Power2Go(DVD・ブルーレイ書き込みソフト)
などのソフトも有名です。
このように、CyberLinkは歴史あるソフトウェアメーカーなので安心して利用できます。
色を変更する方法も簡単なのでおすすめです。
PhotoDirectorで色を変更する方法をマスターしよう
以上、PhotoDirectorで色を変更する方法について解説しました。
再度確認です。
- PhotoDirectorで色を変更する方法はたくさんある
- 事前に領域を指定することで部分的に色を変えることも可能
- AIを使えば空の色を一瞬で変えることができる
早速CyberLinkのPhotoDirectorで色を変更して素敵な画像を完成させましょう。
⇩YouTubeサムネイルの作り方を例にPhotoDirectorの使い方を解説しています。
1,000人中983人の方に「公式サイトより分かりやすい」と高評価をいただいています。
ぜひご活用ください。
\よかったらシェアしてね/
